An AI agent team on a laptop has one obvious weakness: close the lid and the team stops. The routine you scheduled for 7am doesn’t run, the follow-up a bot promised itself waits, and your phone has nothing to connect to. If you want an always-on AI agent team, it has to live on a machine that stays on. For most of us, that’s a small VPS.
This guide covers three ways to self-host AI agents on a VPS with kwant: the one-line installer, the binary under a systemd unit, and Docker Compose. After that, it puts HTTPS in front, signs in your laptop and phone, and locks things down before you leave it running.
Disclosure: I build kwant. It’s open source (AGPL-3.0): a team of AI bots in one Rust binary, with the web app and SQLite built in. It’s the same idea as Grok Bot, Claude Duet or OpenAI dots, a team of named bots you message, except you run it yourself with your own accounts.
Version checked: 0.8.0, released November 10, 2026. Sources: the release notes, the README’s VPS section, the repository’s docker-compose.yml and the install docs. If you just want kwant on your desktop, read Install kwant on Linux instead. For what the team actually does, see Self-Host a Team of AI Agents in One Binary.
When a VPS is worth it
The desktop apps are the quickest start, and for interactive work they’re enough. A server earns its keep when:
- Routines should run on schedule. kwant runs routines on a schedule and follow-ups bots schedule for themselves, and collects the results in an Inbox: what’s waiting on you, what finished, what failed. None of that happens while the machine is asleep.
- You want it on your phone. Installing the web app and getting Web Push notifications needs a page served over HTTPS (or from
127.0.0.1). A server with a domain gives you that. - Several devices should share one team. One server, one data folder, every browser signed in to the same bots.
You don’t have to choose between the laptop and the server. The Mac and Linux apps have Add a server… in the menu bar (the tray on Linux). It takes the server’s address or a sign-in link and opens it in its own window next to the kwant on your own computer.
Pick your install path
| Path | What runs | Good for |
|---|---|---|
| One-line installer | Prebuilt kwnt in ~/.local/bin, as a user service |
Ubuntu 22.04+ or Debian 12+, x86_64 or arm64, quickest setup |
| Binary + systemd unit | kwnt in /usr/local/bin, a dedicated kwnt system user |
You want a classic system service you control line by line |
| Docker Compose | kwnt, the Laya router and a private Chromium for the bots | You already run things in Compose; about 4 GB of free RAM |
The prebuilt server binary needs glibc 2.35 or newer, which is why the floor is Ubuntu 22.04 or Debian 12. Release 0.8.0 ships it as kwnt-linux-x86_64.tar.gz and kwnt-linux-aarch64.tar.gz, so an ARM VPS works too.
Whichever path you pick, you need at least one AI account: a Claude, Codex or Grok CLI login, an Anthropic, OpenAI or xAI API key, or your own OpenAI- or Anthropic-compatible server. On a VPS, API keys are the least fiddly option. Add them in the app under Settings → This space → Accounts.
Path 1: the one-line installer
Log in as the user that should run kwant (not root) and run:
curl -fsSL https://kwant.si/install.sh | sh
As with any curl | sh, you can download the script and read it first. What it does:
- Downloads the prebuilt
kwntfrom the latest release and checks it against its published SHA-256. If they don’t match, nothing is installed. - Puts
kwntin~/.local/binand your data in~/.kwnt. - Never runs
sudo. When something needs admin rights, it prints the command instead. - Starts kwant as a systemd user service when the system allows it, so it comes back after a reboot. If starting at boot needs admin rights, it prints the one command for that:
sudo loginctl enable-linger <your-user>. - Installs the Laya router and a browser for the bots in the background, plus Claude Code when no AI CLI is there yet.
- Ends with a one-time sign-in link that works for 15 minutes.
That service runs plain kwnt serve, which listens on 127.0.0.1:8799 by default. Nothing is reachable from the internet yet, which is what you want. To open the link from your laptop, tunnel the port first. The installer prints the exact command:
ssh -N -L 8799:127.0.0.1:8799 you@your-vps
Then open the link in your laptop’s browser. A request through the tunnel counts as “this machine”, so it needs no token. In the browser you choose your AI and sign in.
To upgrade, run the same line again. It upgrades kwant in place and keeps your data. Lost the link? kwnt signin-link prints a new one.
The installer’s unit reads optional settings from ~/.kwnt/kwnt.env, one NAME=value per line. That’s where KWNT_ALLOWED_ORIGINS goes once you add HTTPS below.
Path 2: the kwnt binary under systemd
kwnt is self-contained: SQLite and the web app are inside it, so the server needs no Node.js. You can build it yourself with make build in a clone (that needs Rust and Node on the build machine) or take it from the release tarball. The tarball route, on your own machine:
curl -fLO https://github.com/alexsergivan/kwant/releases/latest/download/kwnt-linux-x86_64.tar.gz
curl -fLO https://github.com/alexsergivan/kwant/releases/latest/download/kwnt-linux-x86_64.tar.gz.sha256
sha256sum -c kwnt-linux-x86_64.tar.gz.sha256
tar -xzf kwnt-linux-x86_64.tar.gz
scp kwnt you@your-vps:/tmp/kwnt
Use kwnt-linux-aarch64.tar.gz for an ARM VPS. On the server, install the binary and create a dedicated system user:
sudo install -m 755 /tmp/kwnt /usr/local/bin/kwnt
sudo useradd --system --create-home --home-dir /var/lib/kwnt kwnt
Then the unit, based on the one in the README. I changed one line: it binds to 127.0.0.1 instead of 0.0.0.0, because a reverse proxy on the same box is going to face the internet, not kwnt.
# /etc/systemd/system/kwnt.service
[Unit]
Description=kwant AI bot platform
After=network.target

[Service]
Type=simple
User=kwnt
ExecStart=/usr/local/bin/kwnt serve --host 127.0.0.1 --port 8799
Restart=always
Environment=KWNT_DATA_DIR=/var/lib/kwnt
# Environment=KWNT_ALLOWED_ORIGINS=https://kwant.example.com

[Install]
WantedBy=multi-user.target
sudo systemctl daemon-reload
sudo systemctl enable --now kwnt
If you keep the README’s --host 0.0.0.0 instead, close port 8799 in your firewall. On a non-loopback bind, kwnt serve prints a one-time sign-in link at startup. For the unit above, the fallback is the API token, which you paste on the sign-in screen:
sudo cat /var/lib/kwnt/api-token
Run kwnt commands as the user that runs kwnt. Each install has its own token, so one from your laptop won’t open the server. If you want CLI logins rather than API keys, sign the claude, codex or grok CLI in as the kwnt user.
Restart=always keeps the service up, but it doesn’t replace a clean stop. If you run your own Go services next to it, Graceful Shutdown in Go Web Services covers the SIGTERM side of systemd and Docker restarts.
Path 3: AI agents with Docker Compose
The repository’s Compose file starts three services: kwnt, the Laya router with its model baked in, and a private Chromium for the bots. The Docker socket isn’t mounted. You need Docker with Compose and about 4 GB of free RAM.
git clone https://github.com/alexsergivan/kwant.git && cd kwant
KWNT_CLIS=claude,codex docker compose up -d --build   # any of claude,codex,grok; leave out for none
docker compose exec kwnt kwnt doctor                  # what works, and the fix for what doesn't
docker compose exec kwnt claude auth login            # or: codex login --device-auth, grok login --device-auth
docker compose exec kwnt kwnt signin-link             # one-time sign-in link + QR code, 15 minutes
Two things to know:
- Without
--build,docker compose up -dpulls the released imageghcr.io/alexsergivan/kwntinstead of building it. That image has no AI CLIs inside, so you add an API key in the app.KWNT_CLISbuilds them in, and they’re off by default for a reason: per the README’s measurements, they add about 0.9 GB. - Pin and upgrade. Put
KWNT_VERSION=0.8.0in.envto pin a version. To upgrade:docker compose pull kwnt && docker compose up -d.
The README also lists measured idle memory: Laya about 1.7–2.3 GB, the browser about 0.4 GB, kwnt itself about 25 MB. The browser container is capped at 1.5 GB. Most of the 4 GB is the router and Chromium, not kwant.
Data lives in the kwnt-data volume and CLI sign-ins in kwnt-home, so both survive rebuilds. The Compose file publishes the UI on 127.0.0.1:8799 only (KWNT_HOST_PORT changes the port). One limitation: kwant’s own execute_shell tool runs in per-team Docker containers, which would need the host’s Docker socket, so it isn’t available in this stack. The CLIs’ own shell tools work inside the kwnt container.
If you’re coming from an older image where kwnt ran as root and it says /data isn't writable, the documented fix is a one-off docker compose run --rm -u root kwnt chown -R 10001:10001 /data.
For the “cheap box plus Docker” approach in general, I wrote up how I host Go apps in One of The Easiest Ways to Host your Go Web App. The same kind of small VPS fits, as long as it has the RAM.
HTTPS in front, and KWNT_ALLOWED_ORIGINS
All three paths leave kwant on loopback. Put a TLS reverse proxy in front and tell kwant its public address. With Caddy, which fetches certificates for you, the whole Caddyfile is:
kwant.example.com {
	reverse_proxy 127.0.0.1:8799
}
Then set KWNT_ALLOWED_ORIGINS to that HTTPS origin (a comma-separated list if you have several):
# Docker Compose, in the clone
echo KWNT_ALLOWED_ORIGINS=https://kwant.example.com >> .env && docker compose up -d

# One-line installer
echo KWNT_ALLOWED_ORIGINS=https://kwant.example.com >> ~/.kwnt/kwnt.env && systemctl --user restart kwnt

# System unit: uncomment the Environment= line, then
sudo systemctl daemon-reload && sudo systemctl restart kwnt
With nginx, forward the original Host header and allow WebSocket upgrades. The live browser stream checks Origin against Host. This is the block from kwant’s docs, inside your HTTPS server:
location / {
    proxy_pass http://127.0.0.1:8799;
    proxy_http_version 1.1;
    proxy_set_header Host $http_host;
    proxy_set_header Upgrade $http_upgrade;
    proxy_set_header Connection "upgrade";
    proxy_set_header X-Forwarded-Proto $scheme;
    proxy_buffering off;
    proxy_read_timeout 90s;
}
Requests that come through the proxy carry proxy headers, so kwant treats them as remote even though the proxy is on the same machine. That’s correct. It means you sign in properly rather than inheriting “local” trust.
Sign in with a link or a QR code
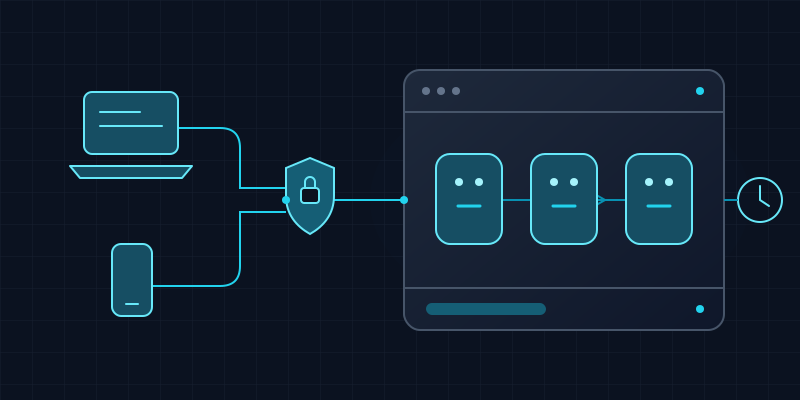
With KWNT_ALLOWED_ORIGINS set, kwnt signin-link (or docker compose exec kwnt kwnt signin-link) prints a one-time link for your domain plus a QR code to scan with your phone. It works once, for 15 minutes. The browser that opens it gets an HttpOnly cookie that lasts a year.
For the next device, run it again, or use a browser that’s already signed in: Settings → All spaces → Signed-in devices → Add a phone or browser shows a one-time QR code. The same list lets you sign each browser out. A new browser can also choose Sign in from another device, which shows a code for 10 minutes. Your signed-in browsers then show New device wants access with Approve or Deny. Approve only a code that’s on a screen you’re holding.
On the phone, install the web app from Settings (on an iPhone, add it to the Home Screen first) and turn on Settings → All spaces → Notifications → Notify me on this device. kwant then sends a Web Push notification for each kind you tick, such as an approval or a question, even with the app closed.
Routines keep running
This is the part that makes the server worth having. Set up a routine once (or ask a bot to set one up; it comes with an Undo button) and it runs on schedule whether your laptop is open or not. Results land in the Inbox, and approvals land on your phone.
Start small: one routine that already works when I run it by hand, in a space set aside for server work. Spaces each have their own bots, accounts, routines and approval rule, so a work space can use the company API keys while a personal space uses yours.
Security notes before you walk away
A self-hosted agent team runs commands and holds API keys, so treat the box like any other server with credentials on it:
- One public port: HTTPS. Don’t publish 8799, Chromium’s debugging port or the Docker socket. The Compose file already keeps CDP on its private network, and the browser container runs read-only with all capabilities dropped.
- Keep sign-in output private. A one-time link signs in as you, and anyone who can read the server’s output or
docker compose logscan use it before you do. - Leave approvals on. New spaces default to Ask only when risky:
git push, network calls, unknown commands and changes outside the bot’s folder show an approval card with the exact command. You get Allow once, Always allow or Deny. Payments always ask, in every mode. In 0.8.0, turning approvals off makes bots just do the work, but they still ask for sign-ins, keys, payments and anything that reaches other people or can’t be undone. On an unattended server, I’d keep the default. - Don’t switch the token check off.
KWNT_REQUIRE_TOKEN=neverexists, but only for running behind your own authentication. - Back up the data folder (
~/.kwnt,/var/lib/kwntor thekwnt-datavolume) privately. It holds the database, account profiles and saved passwords. - Know where messages go. kwant has no telemetry, but your prompts still go to whichever AI providers you add. A server doesn’t make an external model local.
If you’d rather build the loop yourself, Tool Use in Go shows what an agent loop looks like from the inside. A server deployment is where things like approvals and persistence stop being optional.
VPS checklist
- Ubuntu 22.04+ or Debian 12+ (glibc 2.35+), x86_64 or arm64. About 4 GB of free RAM for Compose.
- Install with the one-liner, the binary plus systemd, or
docker compose up -d. - kwant listening on
127.0.0.1:8799, not the public interface. - Caddy or nginx with TLS in front, and
KWNT_ALLOWED_ORIGINSset to the HTTPS origin. - Laptop and phone signed in with a one-time link or QR code.
- One AI account or API key added, and
kwnt doctorclean. - One routine that already works by hand, approvals on Ask only when risky.
- Private backups of the data folder.
Next step: pick a path above and get one routine running on your server. If you’re on a free tier, kwant’s own guide walks through Oracle Cloud’s free tier. If this is the self-hosted AI agent setup you were after, star kwant on GitHub. It helps other people find it.